Are you searching for a unique and memorable way to celebrate a special someone’s birthday? A Mickey and Minnie-themed cake with edible Mickey ears is a perfect way to add a touch of fun and whimsy to the occasion. In this article, we will guide you through the process of making this delightful cake step by step. So let’s get started.
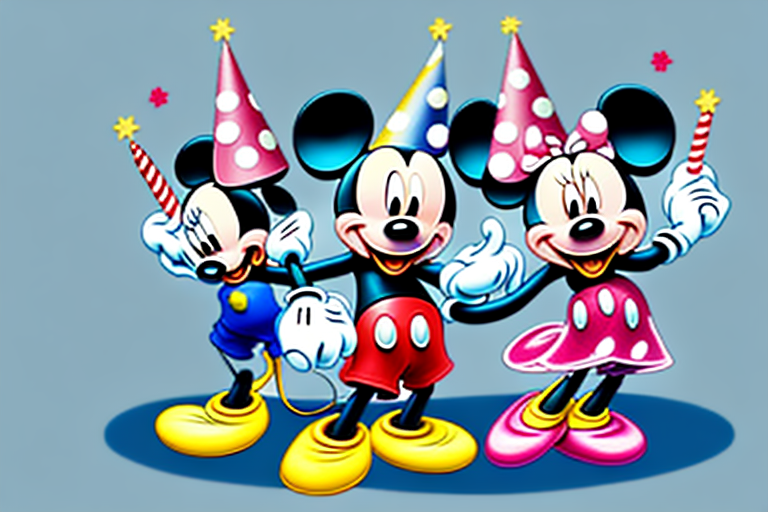
Why Mickey and Minnie-themed cakes are perfect for birthdays
Mickey and Minnie Mouse are beloved characters that have been entertaining children and adults for generations. The adorable couple is a fitting choice for a birthday celebration, both for kids and adults. A Mickey and Minnie-themed cake is versatile and can be customized to suit various preferences, from cute and cartoonish to elegant and sophisticated designs. The possibilities are endless.
One of the great things about a Mickey and Minnie-themed cake is that it can be made to fit any size of celebration. Whether you’re throwing a small party for a few close friends or a large gathering for the whole family, a Mickey and Minnie cake can be tailored to suit your needs. You can choose from a range of sizes, shapes, and flavors to create the perfect cake for your event.
Another reason why Mickey and Minnie-themed cakes are so popular is that they are a great way to add a touch of nostalgia to your celebration. Many people grew up watching Mickey and Minnie on TV or in movies, and having them as the centerpiece of your birthday cake can bring back fond memories of childhood. It’s a fun and playful way to celebrate your special day and share your love of these classic characters with your friends and family.
The tools you need to make a Mickey and Minnie-themed cake with edible ears
To create a beautiful and professional-looking Mickey and Minnie-themed cake, you will need some essential tools, including:- A cake board- A cake turntable- An offset spatula- A piping bag and tips- A fondant smoother- A rolling pin- Silicone Mickey Mouse ear cutters- Edible glue- Food-safe paintbrushes- Gel food coloring in your desired shades- A heatproof mat- A fondant matThese tools are readily available at cake-decorating supply shops or online stores.
Before you start decorating your cake, it’s important to have a clear idea of the design you want to achieve. You can sketch out your design on paper or use a digital design tool to help you visualize the final product. This will also help you determine the amount of fondant and frosting you will need for your cake.
When working with fondant, it’s important to keep it covered with plastic wrap or a damp cloth to prevent it from drying out. You can also add a small amount of vegetable shortening to the fondant to make it more pliable. If you’re using gel food coloring to tint your fondant, be sure to use a toothpick to add small amounts at a time, as a little goes a long way.
The ingredients needed to make edible Mickey ears for the cake
To make the edible Mickey ears, you will need the following ingredients:- Fondant or gum paste (any color you like)- Gel food coloring- Cornstarch or powdered sugar for dusting- Edible pearl dust (optional) for added shineFondant and gum paste are excellent choices for making Mickey ears because they are moldable and firm once dry, allowing the ears to stand upright on the cake.
Before you start making the Mickey ears, it’s important to have a clean and dry work surface. You can use a silicone mat or a smooth countertop for this purpose. Also, make sure to wash your hands thoroughly before handling the fondant or gum paste.
If you want to add some flavor to the Mickey ears, you can use flavored extracts or oils. For example, you can add a few drops of vanilla extract or lemon oil to the fondant or gum paste before kneading it. This will give the ears a subtle but delicious taste that will complement the cake.
How to make Mickey ears using fondant or gum paste
To make the Mickey ears, follow these steps:1. Knead the fondant or gum paste to soften it.2. Add gel food coloring to match the desired color.3. Dust your work surface with cornstarch or powdered sugar.4. Using a rolling pin, roll out the fondant or gum paste to the thickness of about ⅛-inch.5. Use the silicone Mickey Mouse ear cutters to cut out the ears.6. Gently smooth any rough edges with your fingers or the fondant smoother.7. Allow the ears to dry on a heatproof mat overnight.8. Brush on a little of the edible pearl dust to add a subtle shine (optional).Voila, you now have your edible Mickey ears ready for decorating your cake.
It’s important to note that if you’re making these Mickey ears for a cake that will be displayed outdoors or in a warm environment, you may want to add a stabilizer to the fondant or gum paste to prevent them from melting or losing their shape. You can use a small amount of tylose powder or gum tragacanth to help the ears hold their shape and firm up. Simply mix a small amount of the powder with the fondant or gum paste before rolling it out and cutting the ears.
Tips for coloring the fondant or gum paste to match your cake design
When coloring your fondant or gum paste, keep the following tips in mind:1. Start with a small amount of gel food coloring and add more as needed to achieve the desired shade.2. Use color charts or inspiration boards to plan your color scheme beforehand.3. Always wear gloves to avoid staining your hands.4. Knead the coloring into the fondant or gum paste thoroughly to ensure an even color.
5. If you need to color a large amount of fondant or gum paste, divide it into smaller portions and color each one separately. This will make it easier to achieve consistent colors throughout your design.
6. Experiment with mixing different colors to create unique shades. For example, mixing red and yellow can create a vibrant orange color.
How to attach the Mickey ears securely to the cake without damaging it
Here are the steps for attaching the Mickey ears to the cake:1. Apply a dab of edible glue to the back of each ear using a food-safe paintbrush.2. Carefully place the ear on the top of the cake, making sure it is centered and straight.3. Hold it in place gently for a few seconds to allow the glue to set.4. Repeat the process for the other ear, ensuring that it is evenly spaced from the first ear and parallel to it.Avoid forcing the ears into the cake, as this can cause the cake to crumble or break. Gently lifting and placing them can help prevent any breakage.
It is important to note that the size and weight of the Mickey ears can also affect how securely they attach to the cake. If the ears are particularly large or heavy, it may be necessary to use additional support, such as toothpicks or small dowels, to keep them in place. Be sure to insert these supports carefully and securely, and avoid placing them too close to the edge of the cake, where they may be visible or cause the cake to collapse.
Decorating the rest of the cake with Mickey and Minnie-inspired elements
Now that you have the foundation of your Mickey and Minnie-themed cake, it’s time to add the extra details. Using the offset spatula and piping bag and tips, add frosting to your cake. Some ideas for decorations are bows, buttons, and polka dots. Any Mickey and Minnie-inspired elements like their iconic ears, gloved hands, and famous quotes are all perfect additions. The sky’s the limit on what you can create. Let your imagination run wild.
Another great way to add some Mickey and Minnie-inspired elements to your cake is by using fondant. You can create fondant figures of Mickey and Minnie and place them on top of the cake. You can also use fondant to create other decorations like flowers, hearts, and stars. Fondant is a versatile medium that allows you to create intricate designs and shapes.
If you want to take your cake to the next level, you can also add some edible glitter or shimmer dust. This will give your cake a magical touch and make it sparkle. You can also use edible pearls or sugar crystals to add some texture and dimension to your decorations. Just make sure to use food-grade glitter and decorations that are safe to eat.
Using piping techniques to add details like bows, buttons, and polka dots to the cake
Piping techniques are an easy way to add details like bows, buttons, and polka dots to your cake. To pipe, you will need a piping bag, desired tips, and frosting:1. Fill the piping bag with frosting and choose an appropriate tip.2. Hold the piping bag straight up and down, touching the surface of the cake.3. Squeeze the bag gently and pull away to create a dot or line.4. Repeat the process to create your desired design.To create dimensional decorations such as bows, you can use a flat spatula to make a fan shape, then use a piece of fondant to cover the center and hold the decorations in place.
It’s important to note that the consistency of your frosting can greatly affect the outcome of your piping. If your frosting is too thin, it may not hold its shape and can cause your design to droop or flatten. On the other hand, if your frosting is too thick, it may be difficult to pipe and can cause your hand to tire quickly. It’s best to experiment with different consistencies until you find the perfect one for your design.
Adding a personal touch with a custom message or name on the cake
Don’t forget to add a personal touch to the cake with a custom message or name. You can use a piping bag with a small round tip, fondant letter casters or letter cutouts, or even an edible marker. Be gentle when writing on your cake and use light pressure. A steady hand is also beneficial.
Ideas for coordinating party decorations and favors with your Mickey and Minnie theme
Mickey and Minnie are classic characters that have inspired countless party decorations and favors. Some ideas for coordinating items include:- Red and black table linens and balloons- Polka dot plates and cups- Mickey and Minnie paper cutouts for centerpieces- Personalized party favor bags with a Mickey and Minnie themeThese items and various other party supplies are available at party supply stores both in-store and online.
How to transport your finished cake without ruining the decorations
Transporting your finished cake can be a tricky endeavor, but with a little care, it is possible to keep all the decorations intact. Here are a few tips for safely transporting your cake:1. Use a cake carrier or cardboard box to support the cake.2. Secure the cake with rubber bands or other non-slip materials to prevent sliding.3. If you have to transport the cake in a car, place it on a flat surface where it won’t tip over, like the floor in the passenger seat or trunk.4. Avoid sudden stops and sharp turns while driving.By following these tips, you can transport your cake safely and confidently.
With patience, some creativity, and these simple steps, you can make a beautiful and delicious Mickey and Minnie-themed birthday cake that your loved ones will cherish and remember forever.