If you’re a fan of delicious and flaky tarts, you might be wondering how to make them from scratch. It can be intimidating, but with the right tools and techniques, making tarts at home can be easier than you think. In this guide, we’ll cover everything you need to know to make a variety of sweet and savory tarts from scratch.
The tools and ingredients you need to make tarts from scratch
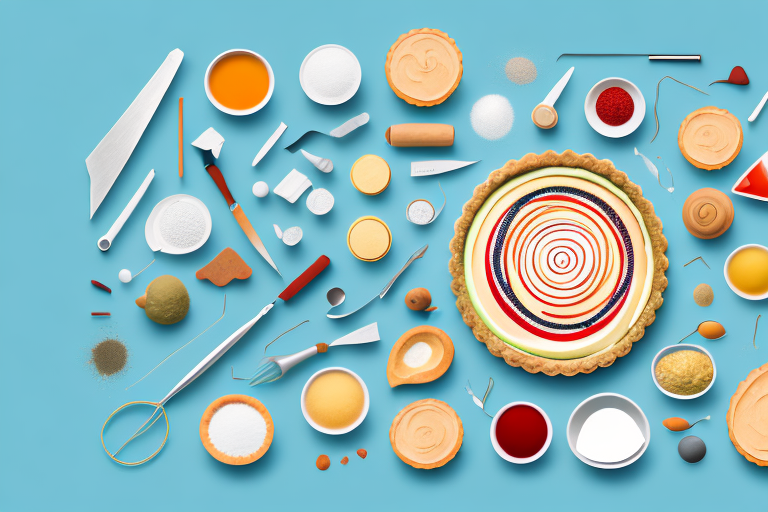
Before you get started on making your tarts, you’ll need to gather a few tools and ingredients. For making the crust, you’ll need flour, sugar, salt, butter, and cold water. In terms of tools, you’ll need a rolling pin, a tart pan, and parchment paper. As for the fillings, it really depends on what type of tart you’re making. Keep reading for more information on that!
When it comes to tart fillings, the possibilities are endless. You can make sweet tarts with fruit fillings like apple, blueberry, or raspberry. Or, you can make savory tarts with fillings like spinach and feta, tomato and basil, or caramelized onion and goat cheese. The key is to choose fillings that complement the flavor of the crust. Once you’ve chosen your filling, you’ll also need any additional ingredients required for that recipe, such as sugar, spices, or cream. With the right tools and ingredients, you’ll be able to make delicious tarts from scratch in no time!
The different types of tarts you can make from scratch
One of the great things about tarts is their versatility. You can make them sweet or savory, with a wide variety of fillings. Some popular sweet fillings are fruit (such as apple or berries), custard, and chocolate. For savory tarts, you could use vegetables (like mushrooms or tomatoes), cheese, and even meat.
Another great thing about tarts is that they can be made in different shapes and sizes. You can make mini tarts for a party or a large tart for a family dinner. Additionally, tarts can be made with different types of crusts, such as a traditional buttery crust or a gluten-free crust for those with dietary restrictions. Experimenting with different crusts and fillings can lead to endless possibilities for delicious tarts.
How to make a classic tart crust from scratch
The crust is arguably the most important part of a tart, so it’s worth putting in the effort to make it from scratch. To make a classic tart crust, you’ll need to combine flour, sugar, and salt in a bowl. Add small pieces of butter, mixing until the dough is crumbly. Next, add cold water gradually, until the dough comes together. Roll out the dough on a floured surface, and transfer it to your tart pan.
One important tip to keep in mind when making a tart crust is to ensure that the butter is cold. This is because when the cold butter is mixed with the flour, it creates small pockets of air that will help the crust to be flaky and tender. Additionally, it’s important to not overwork the dough, as this can result in a tough crust. Once the crust is in the pan, it’s a good idea to blind bake it before adding the filling. This involves baking the crust without the filling, to ensure that it is fully cooked and won’t become soggy when the filling is added.
Tips for making the perfect tart filling
When it comes to filling your tart, there are a few things to keep in mind. First, make sure that your filling is not too wet – this can make the crust soggy. Additionally, you want to ensure that the filling is well-distributed throughout the tart. If you’re using fruit, consider pre-baking it to get rid of excess moisture.
Another important factor to consider when making tart filling is the sweetness level. It’s important to strike a balance between the sweetness of the filling and the tartness of the crust. If your filling is too sweet, it can overpower the delicate flavor of the crust. On the other hand, if it’s not sweet enough, it can make the tart taste bland.
Lastly, don’t be afraid to get creative with your tart fillings. While classic fruit fillings like apple or cherry are always delicious, there are plenty of other options to explore. Consider using savory ingredients like cheese or vegetables for a unique twist on a traditional dessert. Or, experiment with different flavor combinations like chocolate and raspberry or lemon and blueberry.
How to decorate your tarts like a pro
Once your tart is baked and filled, it’s time to decorate it! A simple dusting of powdered sugar always looks lovely, but you can also get creative with toppings. For fruit tarts, consider slicing up fresh fruit to arrange on top. For savory tarts, try sprinkling herbs or grated cheese on top.
If you want to take your tart decoration to the next level, try using a piping bag to add whipped cream or frosting in decorative patterns. You can also use cookie cutters to cut out shapes from rolled-out dough and place them on top of your tart before baking for a fun and unique design.
Another great way to decorate your tarts is by using a glaze. For fruit tarts, mix together some apricot jam and water and brush it over the fruit to give it a shiny finish. For chocolate tarts, melt some chocolate and mix it with heavy cream to create a smooth ganache that can be poured over the top of the tart.
Troubleshooting common tart-making problems
If you’re having trouble with your tarts, don’t panic! Here are some common issues and solutions:
- If your crust is too hard: try adding a little more water to the dough to make it more pliable.
- If your crust is too crumbly: try adding an extra egg yolk to the dough for more moisture.
- If your filling is too runny: try baking it at a higher temperature for a little longer to evaporate excess moisture.
However, there are some other issues that you may encounter while making tarts. One of them is the problem of a soggy crust. This can happen if the filling is too wet or if the crust is not pre-baked before adding the filling. To avoid this, you can pre-bake the crust for a few minutes before adding the filling, or you can sprinkle some flour or breadcrumbs on the crust before adding the filling to absorb any excess moisture.
Another common problem is the filling sinking in the middle of the tart. This can happen if the filling is too heavy or if the crust is not sturdy enough to hold the filling. To prevent this, you can blind bake the crust before adding the filling, or you can add a layer of cream cheese or custard at the bottom of the crust to provide a sturdy base for the filling.
A step-by-step guide to making fruit tarts from scratch
If you’re specifically interested in making fruit tarts, here’s a step-by-step guide:
- Preheat your oven to 375°F.
- Prepare your dough as instructed above, and roll it out into your tart pan.
- Pre-bake the crust for 10-12 minutes, until just beginning to turn golden brown.
- While the crust is pre-baking, prepare your fruit filling. You’ll need about 2 cups of fruit – sliced or chopped to your liking. Toss the fruit with a little sugar and lemon juice.
- Remove the crust from the oven, and pour the fruit filling into it.
- Bake for an additional 20-25 minutes, until the crust is golden brown and the fruit has softened.
- Let the tart cool, and serve with a dollop of whipped cream!
There are a few tips and tricks to keep in mind when making fruit tarts. Firstly, make sure to use a tart pan with a removable bottom – this will make it much easier to remove the tart from the pan once it’s finished baking. Additionally, if you’re using particularly juicy fruit, you may want to sprinkle a little cornstarch over the fruit before pouring it into the crust. This will help to thicken the filling and prevent it from becoming too runny.
Finally, don’t be afraid to get creative with your fruit combinations! While classic fruit tart fillings include berries, peaches, and plums, you can also experiment with more unusual fruits like kiwi, mango, or even figs. Just make sure to adjust the amount of sugar and lemon juice accordingly, as some fruits may be sweeter or more acidic than others.
How to make savory tarts from scratch
If you’re interested in making savory tarts, the process is similar to making sweet tarts. However, you’ll want to use a more neutral crust (less sugar) and fillings that complement the savory flavor profile. Consider using vegetables (roasted or sautéed), cheese, and herbs to create a delicious savory tart.
One important tip to keep in mind when making savory tarts is to pre-cook any vegetables that you plan to use as a filling. This will ensure that they are fully cooked and tender when the tart is finished baking. Additionally, you can experiment with different types of cheeses and herbs to create unique flavor combinations. Some popular options include feta and spinach, goat cheese and caramelized onions, or cheddar and bacon. Don’t be afraid to get creative and try out new flavor combinations!
Creative ways to use leftover tart dough
If you have leftover tart dough, don’t waste it! There are a few fun things you can do with it:
- Create mini tartlets by using a cookie cutter to cut the dough into smaller circles. Fill the mini tarts with jam or caramel for a sweet treat.
- Use the dough to make homemade pop-tarts. Roll it out, cut it into rectangles, and fill with your favorite jam. Bake for 15-20 minutes.
- Repurpose the dough into savory crackers. Roll it out thinly, sprinkle with salt and herbs, and bake until crispy.
Dairy-free and gluten-free options for making tarts from scratch
If you have dietary restrictions, that doesn’t mean you can’t enjoy delicious tarts! For a dairy-free crust, you can replace butter with coconut oil or shortening. For a gluten-free crust, try using a mix of rice flour and almond flour. There are also many recipes online that cater to specific dietary needs.
The history and cultural significance of tarts in different countries
While tarts are a popular dessert in many countries, they have different variations and cultural significance. In France, for example, the tarte Tatin (an inverted apple tart) is a classic. In England, savory meat pies are often referred to as tarts. Do a bit of research to learn more about how tarts are enjoyed around the world!
How to store and reheat your homemade tarts
If you have leftovers, you can store your tart in the fridge for 3-4 days. When reheating, it’s best to use the oven at a low temperature (325°F) to avoid overcooking the crust. Be sure to cover the tart with foil to prevent burning.
Serving suggestions for your homemade tarts
Tarts are a versatile dessert that can be served in many different ways. Here are a few ideas:
- Top with whipped cream or ice cream for a classic dessert.
- Serve with a cup of tea or coffee for an afternoon treat.
- Plate with a side of fresh fruit for a light and refreshing dessert.
- Pack into individual containers for a picnic or lunchbox treat.
Now that you have all the tools and tips you need, it’s time to get baking! Whether you’re in the mood for a sweet or savory tart, the possibilities are endless. Don’t be afraid to get creative and experiment with different fillings and toppings. Happy baking!