Danish pastries are a delicious treat that is beloved all over the world. They are a flaky and buttery pastry with sweet or savory fillings that make a great breakfast or anytime snack. Whether you enjoy a classic Danish pastry or a modern variation, they are sure to tantalize your taste buds. In this article, we will explore the ingredients that go into making a perfect Danish pastry.
The history of Danish pastries and their origins
Before we dive into the ingredients of Danish pastries, let us take a moment to appreciate their history and origin. Contrary to its name, Danish pastries did not originate in Denmark. They came from Vienna in Austria in the 19th century and were known as ‘Viennese bread.’ It was not until later that the pastry reached Denmark, where bakers added their unique flair to the recipe, and it became known as ‘Danish pastry.’
The popularity of Danish pastries quickly spread throughout Europe and eventually made its way to the United States. In the early 1900s, Danish immigrants brought their pastry-making skills to America, and Danish pastries became a staple in American bakeries and cafes.
Today, Danish pastries come in a variety of shapes and flavors, from the classic cinnamon swirl to fruit-filled varieties like raspberry and apple. They are enjoyed as a breakfast pastry, a mid-day snack, or a sweet treat to end a meal. Whether you prefer them with a cup of coffee or a glass of milk, Danish pastries are a delicious and beloved pastry that has stood the test of time.
Traditional Danish pastry shapes and styles
There are various shapes and styles of Danish pastries, and each one has its unique name. The classic style is called the ‘snail’ or ‘cinnamon roll, ‘ and it is rolled into a spiral shape. The ‘bear claw’ is another popular Danish pastry that has a crescent shape that is filled with almond paste, and it resembles a bear’s claw. The ‘apple turnover’ is a puff pastry shape that is filled with fresh apples, sugar, and cinnamon.
Other popular Danish pastry shapes include the ‘rosinboller,’ which is a small, round pastry filled with raisins and topped with pearl sugar. The ‘spandauer’ is a rectangular-shaped pastry that is filled with custard or jam and topped with icing. The ‘kringle’ is a twisted pastry that is often filled with marzipan or nuts and shaped into a pretzel-like form. No matter the shape or style, Danish pastries are a beloved treat in Denmark and around the world.
The importance of butter in the making of Danish pastries
Butter is a crucial ingredient when it comes to the making of Danish pastries. It is what gives the pastry its flaky and buttery texture. Many bakers use unsalted butter that is chilled and cut into small pieces before adding it to the dough. Be careful not to overwork the dough when adding the butter, as this can result in a tough pastry.
In addition to providing the pastry with its signature texture, butter also plays a role in the flavor of Danish pastries. The high fat content in butter gives the pastry a rich and indulgent taste that is hard to replicate with other ingredients. Some bakers even use flavored butter, such as honey or cinnamon, to add an extra layer of flavor to their pastries.
It is important to note that the quality of the butter used in Danish pastries can greatly affect the final product. Using low-quality butter can result in a pastry that is greasy or lacks flavor. Many professional bakers opt for high-quality European butter, which has a higher fat content and richer flavor than American butter.
Flour types used in making Danish pastries
The type of flour used also plays an essential role in the making of Danish pastries. Most bakers use all-purpose flour, but some use bread flour or a combination of the two. The higher gluten content of bread flour results in a firmer pastry that can hold more filling. All-purpose flour is more commonly used and results in a lighter pastry that can hold a variety of fillings.
Another type of flour that can be used in making Danish pastries is pastry flour. Pastry flour has a lower protein content than all-purpose flour, which results in a more delicate and tender pastry. However, it may not hold up as well to heavier fillings. Some bakers also use a blend of pastry flour and all-purpose flour to achieve a balance between tenderness and structure in their pastries.
Sweet vs. savory fillings for Danish pastries
The filling is where the creativity of the baker comes into play. Some popular sweet fillings include fruit preserves, chocolate, marzipan, and custard. Savory fillings often include cheese, ham, or spinach. For those who can’t decide, many bakers create pastries that feature both sweet and savory fillings.
It’s not just the type of filling that matters, but also the texture. Sweet fillings like fruit preserves and custard are often smooth and creamy, while savory fillings like cheese and ham can be chunky or crumbly. The texture of the filling can add an extra dimension to the pastry, making it more interesting to eat.
How to make a classic Danish pastry dough from scratch
To make a classic Danish pastry dough from scratch, you will need flour, sugar, salt, yeast, unsalted butter, eggs, and milk. Begin by whisking the flour, sugar, salt, and yeast together in a bowl. Cut the butter into small pieces and add it to the flour mixture. Next, add the eggs and milk to the mixture and knead the dough briefly. Finally, chill the dough for several hours before rolling it out and shaping it with your desired filling.
One important tip to keep in mind when making Danish pastry dough is to handle the dough as little as possible. Overworking the dough can result in a tough and dense pastry. Additionally, when rolling out the dough, be sure to use a light touch and avoid pressing down too hard with the rolling pin. This will help to keep the layers of butter and dough intact, resulting in a flaky and delicious pastry.
Tips and tricks for laminating Danish pastry dough for flaky layers
The secret to achieving those beautiful and flaky layers of Danish pastry dough is the lamination process. Lamination is the process of sandwiching the butter between thin layers of dough and then rolling and folding it several times to create those flaky layers. To ensure that your dough is laminated correctly, be sure to roll out the dough evenly and efficiently and make sure that the butter is evenly distributed before folding.
Another important tip for laminating Danish pastry dough is to keep the dough and butter cold throughout the process. This will prevent the butter from melting and seeping into the dough, which can result in a greasy and heavy pastry. You can also try using a pastry scraper to help with the folding process and to ensure that the layers are even. Finally, be patient and take your time with the lamination process. Rushing can result in uneven layers and a less-than-perfect pastry.
Different ways to shape and fill your Danish pastries
There are endless possibilities when it comes to shaping and filling Danish pastries. Some popular shapes include braids, twists, and squares. When it comes to fillings, you can experiment with various fruits, chocolates, cheeses, and meats. Let your creativity run wild and see what unique combinations you come up with.
One popular filling for Danish pastries is almond paste. This sweet and nutty filling is made from ground almonds, sugar, and egg whites. It can be used on its own or combined with other fillings such as fruit or chocolate. To make your own almond paste, simply mix together ground almonds, sugar, and egg whites until a smooth paste forms. Spread it onto your pastry dough before shaping and baking for a delicious and unique twist on the classic Danish pastry.
Techniques for achieving the perfect bake on your Danish pastries
Getting the perfect bake on your Danish pastries can be tricky, but with a few tips and tricks, you can achieve mouth-watering results. Keeping your butter and dough chilled during the baking process is essential to creating flaky layers. Preheating your oven accurately and baking at the right temperature and time can also have a significant impact on the final product.
Another important factor to consider when baking Danish pastries is the type of flour you use. Using a high-quality flour with a high protein content can help create a stronger dough that can hold up to the layers of butter. Additionally, using a pastry brush to apply an egg wash before baking can give your pastries a beautiful golden brown color and a shiny finish.
Finally, don’t be afraid to experiment with different fillings and toppings to make your Danish pastries truly unique. From classic fruit fillings like apple and cherry to more unconventional options like Nutella or savory cheese and herb fillings, the possibilities are endless. Just be sure to adjust your baking time and temperature accordingly based on the filling you choose.
Variations on the classic Danish pastry recipe
The classic Danish pastry recipe is delicious on its own, but you can also add your unique twist to it. One popular variation is to use almond paste as a filling and top the pastry with powdered sugar. Another variation is to add dried fruit or nuts to the dough. Experiment with different combinations and see what works best for you.
If you want to make your Danish pastry even more indulgent, you can try adding chocolate chips or a chocolate drizzle on top. Another option is to incorporate cream cheese into the filling for a tangy twist. Don’t be afraid to get creative and try out new flavor combinations.
For a healthier twist on the classic Danish pastry, you can use whole wheat flour instead of all-purpose flour. You can also substitute the butter with coconut oil or applesauce to reduce the amount of saturated fat. Additionally, you can use honey or maple syrup instead of sugar to sweeten the pastry. These substitutions will not only make your pastry healthier but also add a unique flavor to it.
Pairing Danish pastries with coffee, tea, or other beverages
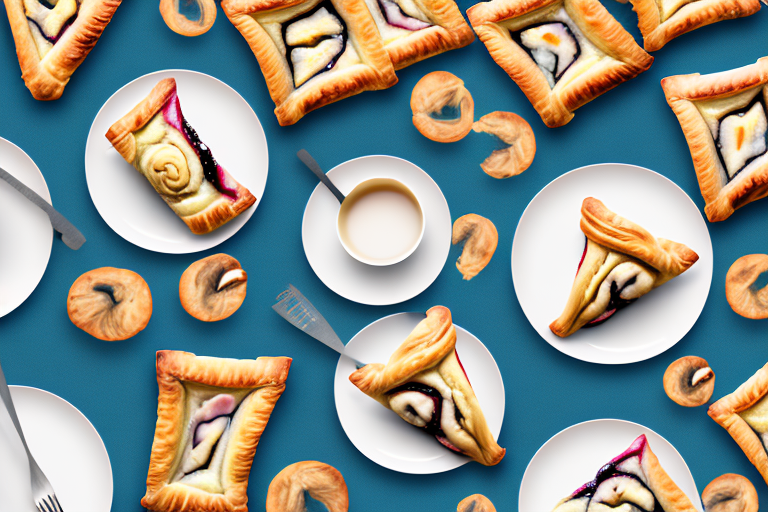
Danish pastries are delicious on their own, but they become even better when paired with a hot cup of coffee or tea. The sweetness of the pastry complements the bitterness of the coffee or tea, resulting in the perfect balance of flavor. You can also pair your Danish pastry with a refreshing glass of milk or a fruit smoothie.
How to store and reheat your leftover Danish pastries
If you have any leftover Danish pastries, it’s essential to store them correctly to maintain their freshness. Wrap them in plastic wrap or seal them in airtight containers and store them in the refrigerator for up to three days. When reheating, preheat your oven to 350 degrees Fahrenheit, and bake for five to ten minutes until heated through and crispy.
The popularity of Danish pastries in different parts of the world
Danish pastries have become popular all over the world and are enjoyed in many different countries. In Germany, they are known as ‘Franzbrötchen.’ In Japan, they are called ‘Danish sandwiches,’ and in the United States, they are a staple in coffee shops and bakeries.
Famous bakeries known for their delicious Danish pastries
Some bakeries are known for their delicious Danish pastries and are must-visit destinations for any pastry lover. In Denmark, Lagkagehuset and Andersen Bakery are two popular bakeries known for their fresh and delicious pastries. In the United States, Tartine Bakery in San Francisco and Dominique Ansel Bakery in New York are famous for their unique and mouth-watering pastries.
In conclusion, Danish pastries are a delightful treat that is enjoyed by people all over the world. Creating the perfect Danish pastry requires attention to detail and a willingness to experiment with different shapes and fillings. Whether you are a seasoned baker or a beginner, following the tips outlined in this article will help you create the perfect Danish pastry every time. So go ahead, roll up your sleeves, and get baking!