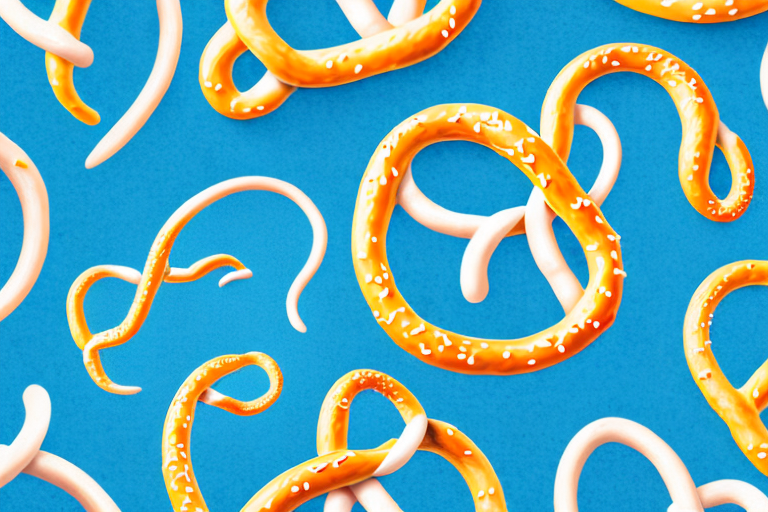
If you’re a fan of soft, chewy, salty pretzels and have always wanted to make them at home, you’re in luck! Homemade pretzels are easier to make than you might think, and you only need a few basic ingredients to get started. In this article, we’ll cover everything you need to know about making delicious pretzels in the comfort of your own kitchen.
The history of pretzels and their significance
Pretzels have been around for centuries, and their origins can be traced back to the Medieval period in Europe. The twisted shape of the pretzel is said to represent arms crossed in prayer, which is important as the pretzel was used as a Lenten food for Christians. Nowadays, pretzels are enjoyed all over the world as a delicious snack or appetizer. From street vendors to sporting events, you’ll find pretzels in many shapes and flavors.
One interesting fact about pretzels is that they were once used as a form of currency in Germany. Bakers would accept pretzels as payment for their goods, and they were even used to pay taxes. This shows just how important pretzels were to the people of Germany.
In addition to being a tasty snack, pretzels also have some nutritional benefits. They are low in fat and calories, and they contain a good amount of fiber. Pretzels are also a good source of carbohydrates, which can provide energy for the body. However, it’s important to note that some types of pretzels may be high in sodium, so it’s best to enjoy them in moderation.
The ingredients needed to make the perfect pretzel
To make homemade pretzels, you’ll need a few ingredients, including flour, yeast, water, sugar, salt, and baking soda. All of these can be found at your local grocery store. You can use either all-purpose flour or bread flour, but bread flour will make for a chewier pretzel. You’ll also need a large mixing bowl, a lightly floured surface, and a baking sheet lined with parchment paper.
One important thing to keep in mind when making pretzels is the importance of the boiling step. After shaping the pretzels, you’ll need to boil them in a mixture of water and baking soda. This step is what gives pretzels their signature chewy texture and brown color. Be sure to only boil them for about 30 seconds on each side, and then transfer them to the baking sheet to finish baking in the oven.
Step-by-step instructions for making homemade pretzels
First, mix your dry ingredients together in a bowl, including the flour, yeast, salt, and sugar. In another bowl, mix your warm water (around 100-110℉) with the wet ingredients, including the baking soda. Add the wet and dry ingredients together and knead the dough until it’s smooth and elastic. Cover the dough with a towel and let it rise for about an hour.
Next, divide the dough into equal pieces and shape each piece into a long rope. To form the pretzel shape, bring the ends of the dough up and cross them over each other twice before bringing them down and tucking them under the bottom of the pretzel. Place each pretzel onto your lined baking sheet, cover them for a second rise, and then boil them in a pot of water with baking soda for about 30 seconds.
Finally, brush your boiled pretzels with some egg wash and sprinkle them with your desired toppings like salt, cheese, or cinnamon sugar. After baking for around 12-15 minutes, your pretzels should be golden brown and ready to enjoy.
For a fun twist on traditional pretzels, try adding some flavor to your dough. You can mix in ingredients like garlic powder, herbs, or even shredded cheese to give your pretzels a unique taste. Another option is to experiment with different dipping sauces, like honey mustard or spicy cheese, to complement the flavors of your pretzels. Don’t be afraid to get creative and make your homemade pretzels truly your own!
Tips and tricks for achieving the perfect dough consistency
The key to a delicious pretzel is achieving the perfect dough consistency. If your dough is too dry or too sticky, it can affect the flavor and overall texture of your pretzels. To make sure your dough is just right, be sure to measure your ingredients accurately, and adjust the amount of flour or water as needed. You may also want to knead your dough for a little bit longer than you think, and be patient during the rising process, as this will help the gluten develop and give your pretzels that perfect chewy texture.
Another important tip for achieving the perfect dough consistency is to use the right type of flour. Bread flour or all-purpose flour with a higher protein content is ideal for making pretzel dough, as it will give your pretzels a chewier texture. Additionally, you can add a small amount of malt powder or honey to your dough to enhance the flavor and color of your pretzels. Remember, practice makes perfect, so don’t be afraid to experiment with different techniques and ingredients until you find the perfect recipe for your taste buds.
How to shape and twist your pretzels for the best results
Shaping and twisting your pretzels may seem daunting at first, but it’s much easier than it looks. Start by forming a long rope out of your dough, and then shape it into a “U” shape. Twist the two ends of the “U” together once or twice, and then bring them down to the bottom of the “U” to form the pretzel shape. Don’t worry if your first few pretzels don’t look perfect – practice makes perfect!
One tip for achieving the perfect pretzel shape is to make sure that the dough is evenly rolled out and not too thick. This will make it easier to twist and shape the dough without it breaking or becoming misshapen. Additionally, you can experiment with different types of pretzel shapes, such as the classic “twist” or a “braid” shape, to add some variety to your pretzel-making skills.
The importance of boiling your pretzels before baking
Boiling your pretzels with baking soda water is a crucial step in achieving that classic pretzel flavor and texture. The baking soda water causes the surface of the pretzels to puff up and turn golden brown upon baking. Skipping this step can result in a denser pretzel and less pronounced “pretzel” flavor.
Another benefit of boiling your pretzels is that it helps to remove any excess flour or debris that may be on the surface of the dough. This ensures that your pretzels have a smooth and even texture, without any unwanted lumps or bumps.
Additionally, boiling your pretzels can help to extend their shelf life. The high temperature of the boiling water kills off any bacteria or yeast that may be present on the surface of the dough, which can cause the pretzels to spoil more quickly. This means that your pretzels will stay fresh for longer, allowing you to enjoy them for days after baking.
Seasoning options for traditional or creative pretzels
While salt is a popular topping for pretzels, you can get creative and try out different seasonings and flavors. Some delicious options include garlic, parmesan cheese, cinnamon sugar, or even a drizzle of chocolate or caramel sauce for a sweeter twist. The possibilities are endless!
If you’re looking for a healthier option, you can try using herbs and spices like rosemary, thyme, or paprika to add flavor without adding extra calories. Another option is to use a low-sodium seasoning blend to reduce your salt intake while still enjoying the delicious taste of pretzels.
For those who love a bit of heat, you can add some spice to your pretzels with cayenne pepper, chili powder, or even hot sauce. If you’re feeling adventurous, you can also experiment with different types of mustard or vinegar-based sauces to give your pretzels a tangy kick.
How to store and reheat your homemade pretzels
If you have any pretzels left over after snacking on them, you can easily store them in an airtight container at room temperature for up to two days. To reheat, simply pop them in a 350℉ preheated oven for 5-7 minutes, or until they’re heated through and crispy once again.
It’s important to note that if you want to store your pretzels for longer than two days, it’s best to freeze them. Wrap each pretzel individually in plastic wrap and then place them in a freezer-safe container or bag. When you’re ready to enjoy them again, let them thaw at room temperature for a few hours before reheating them in the oven as usual.
Serving suggestions and pairing ideas with dips and drinks
Pretzels are a great appetizer or snack on their own, but they can also be paired with a variety of dips and drinks. Some classic options include mustard, cheese sauce, or honey mustard for a sweet and savory combination. In terms of drinks, beer is a natural pairing with pretzels, but you can also try out lemonade or a fruit smoothie for a refreshing twist.
Common mistakes to avoid when making homemade pretzels
One common mistake when making pretzels is adding too much flour to the dough, which can result in a dense and dry pretzel. Another mistake is not letting the dough rise for long enough, as this can also affect the texture and flavor of your pretzels. Finally, make sure your baking soda water is hot enough to properly boil the pretzels, as this can also affect the final outcome.
Frequently asked questions about making pretzels at home
Q: Can I use instant yeast instead of active dry yeast?
A: Yes, you can use instant yeast for this recipe. Just be sure to adjust the amount accordingly, as instant yeast requires less time to rise.
Q: Can I use whole wheat flour instead of all-purpose flour?
A: Yes, you can use whole wheat flour for this recipe, but it may result in a denser pretzel.
Q: Can I freeze my pretzel dough?
A: Yes, you can freeze your pretzel dough for up to 3 months. Be sure to wrap it tightly in plastic wrap and thaw it in the refrigerator before using.
Vegan, gluten-free, or other dietary restriction options for making pretzels
If you have dietary restrictions, don’t worry – you can still enjoy homemade pretzels! For a vegan option, simply replace the egg wash with soy milk or a non-dairy milk of your choice. For a gluten-free option, use a gluten-free flour blend and follow the same steps as the regular recipe.
The cost savings and environmental benefits of making your own pretzels
Making your own pretzels at home can not only be fun and delicious, but it can also save you money in the long run. Store-bought pretzels can be expensive, especially if you’re feeding a crowd. Plus, making your own pretzels means you’ll be using fewer plastic bags or packaging. It’s a win-win for your wallet and the environment!
Additional recipes that incorporate homemade pretzels as an ingredient
If you have any leftover pretzels, or simply want to try out some new recipes, there are plenty of options for incorporating them into other dishes. Some great ideas include using them as a topping for soups, salads, or even using them as a bun for sandwiches. You can also crush them up and use them as a coating for chicken or fish for a tasty crunch.
Now that you have all the information and tips you need to make perfect pretzels at home, it’s time to get baking! Whether you’re making them for yourself or to share with friends and family, they’re sure to be a hit.