If you’re a fan of freshly baked bread and are looking for a new recipe to try, why not give walnut bread a go? Not only is it tasty and filling, but it’s also packed with amazing health benefits. In this article, we’ll show you how to make delicious and nutritious walnut bread at home. From the ingredients you’ll need to the equipment required and the perfect environment to let your dough rise, we’ll cover everything you need to know.
Why Choose Walnut Bread?
Walnut bread is nutty, rich and flavourful, perfect for those who like an earthy taste. The nuts in the bread bring a crunchy texture and a depth of flavour that makes each bite more satisfying. The taste is perfect if you want a change from standard white bread or a wholemeal loaf.
Additionally, walnut bread is a great source of healthy fats and protein. Walnuts are known to be high in omega-3 fatty acids, which are essential for brain health and reducing inflammation in the body. They also contain antioxidants and other nutrients that can help improve heart health and lower cholesterol levels. So not only does walnut bread taste great, it can also be a nutritious addition to your diet.
The Health Benefits of Walnuts
Walnuts are not only delicious, but they’re also packed with health benefits. They contain a high amount of protein, providing energy to help you get through the day. They also boast a good source of Omega-3, Omega-6, and vitamin E. These help maintain good heart health, lower the risk of certain cancers, and even protect against cognitive decline.
In addition to their heart-healthy benefits, walnuts have also been shown to improve gut health. They contain prebiotic fibers that promote the growth of beneficial bacteria in the gut, which can improve digestion and reduce inflammation. Studies have also suggested that consuming walnuts may help lower cholesterol levels and improve blood sugar control, making them a great addition to a healthy diet.
Ingredients Needed to Make Walnut Bread
The ingredients needed for walnut bread are straightforward. You will need flour, water, yeast, sugar, salt, walnuts, and olive oil. The recipe is relatively simple, so you don’t need to worry about sourcing any exotic ingredients.
Walnut bread is a delicious and healthy alternative to regular bread. Walnuts are a great source of protein, fiber, and healthy fats, making this bread a nutritious addition to your diet. Additionally, the nutty flavor of the walnuts adds a unique and delicious taste to the bread.
When making walnut bread, it’s important to use fresh walnuts. Stale or rancid walnuts can ruin the flavor of the bread. You can tell if walnuts are fresh by their smell and taste. Fresh walnuts should have a sweet, nutty aroma and a crisp texture. If the walnuts smell musty or have a bitter taste, they are likely stale and should not be used.
Equipment Required to Make Walnut Bread
You will need a mixture of equipment to make walnut bread, including a stand mixer, mixing bowl, measuring cups, and spoons, a wooden spoon, and a bread loaf pan. If you don’t have a mixer, you can still make the bread by hand, but it can take longer and require more elbow grease.
In addition to the equipment mentioned above, you will also need a sharp knife to chop the walnuts and a clean kitchen towel to cover the bread while it rises. It’s important to have all the necessary equipment ready before starting the recipe to ensure a smooth baking process.
Preparing the Dough for Your Walnut Bread
You’ll start by mixing the sugar and yeast together to activate the yeast so that it can do its job of making the bread rise. Next, add the flour, water, and salt, mixing everything together until the ingredients combine. Once the dough has come together, knead it for ten minutes, or until it becomes supple and soft.
After kneading the dough, it’s time to add the chopped walnuts. Sprinkle the walnuts over the dough and knead it again for a few minutes until the walnuts are evenly distributed throughout the dough. Cover the dough with a damp cloth and let it rise in a warm place for about an hour, or until it has doubled in size. Once the dough has risen, shape it into a loaf and place it in a greased bread pan. Let it rise again for another 30 minutes before baking it in a preheated oven at 375°F for 30-35 minutes, or until the bread is golden brown and sounds hollow when tapped on the bottom.
How to Knead the Dough Perfectly
The key to successful bread-making is kneading the dough correctly. You’ll want to press into the dough with the heel of your hand, fold it over, turn it, and keep kneading until it becomes smooth and elastic. This process can take around ten minutes, but don’t worry if it takes longer.
One important thing to keep in mind while kneading the dough is to not add too much flour. Adding too much flour can make the dough dry and tough, which will result in a dense and heavy bread. Instead, add flour gradually and only as much as needed to prevent the dough from sticking to your hands and the work surface.
Another tip for perfect kneading is to use a timer. Set a timer for 10 minutes and focus on kneading the dough until the timer goes off. This will ensure that you knead the dough for the right amount of time and don’t cut the process short. With practice, you’ll be able to tell when the dough is ready just by its texture and elasticity.
The Perfect Environment for Your Dough to Rise
The perfect environment for your dough to rise is somewhere warm and draft-free. Scoring the dough with a knife before baking will help the bread to expand and allow for any trapped air to escape.
It is important to note that the temperature of the environment can greatly affect the rising process. If the temperature is too cold, the dough may not rise at all, while if it is too hot, the dough may rise too quickly and result in a less desirable texture. A temperature of around 75-80°F is ideal for most bread recipes.
Another factor to consider is the humidity of the environment. If the air is too dry, the dough may form a hard crust on the surface, preventing it from rising properly. To combat this, you can cover the dough with a damp cloth or place a bowl of water nearby to increase the humidity.
Shaping Your Dough into a Loaf or Rolls
You have different options when it comes to shaping your dough. You may want to use a bread loaf pan to bake a classic rectangular loaf, or alternatively, you might choose to shape your dough into rolls. You can make four or six round rolls, or even braid your dough. Let it rise again once you’ve shaped it, and then you’re ready to bake.
If you want to add some extra flavor to your bread, you can also try stuffing your dough with different ingredients before shaping it. For example, you can add cheese, herbs, or even olives to your dough. Simply roll out your dough, add your desired ingredients, and then shape it into a loaf or rolls.
Another option is to create a decorative pattern on top of your bread. You can use a sharp knife to make diagonal slashes on top of your loaf, or use a cookie cutter to create a unique shape. This will not only make your bread look more appealing, but it will also allow it to rise more evenly in the oven.
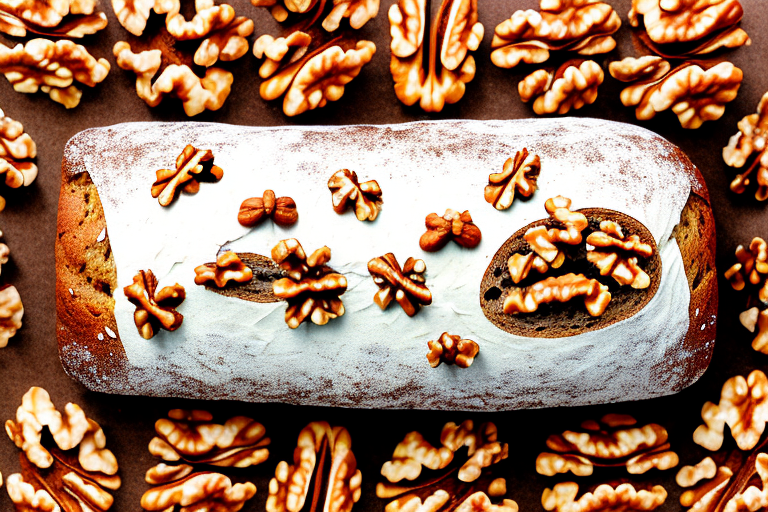
Adding Walnuts to Your Bread Dough
Once you have made your dough, you can add chopped walnuts to mix things up a bit. You can fold them into the dough before baking, or you can sprinkle them on top of the dough before placing it in the oven. This adds an extra crunch to your bread, making it all the more delicious.
Walnuts are not only a tasty addition to your bread, but they also have health benefits. They are a good source of protein, fiber, and healthy fats. They also contain antioxidants and omega-3 fatty acids, which can help reduce inflammation and improve heart health. So, not only will your bread taste great with walnuts, but it can also be a nutritious choice.
Baking Your Walnut Bread: Tips and Tricks
When it comes to baking your walnut bread, there are a few things to keep in mind. You’ll want to preheat your oven to the right temperature and bake the bread until it’s golden brown. If you’re unsure, use a thermometer to check if it’s fully cooked. You can also tap the bottom of the bread – it should sound hollow to show that it’s cooked through.
Another important tip is to let your bread cool completely before slicing it. This will prevent it from crumbling and falling apart. You can also store your walnut bread in an airtight container or plastic bag to keep it fresh for longer.
For an extra boost of flavor, you can add some honey or maple syrup to your walnut bread batter. This will give it a sweet and nutty taste that pairs perfectly with a cup of coffee or tea. You can also experiment with different types of nuts, such as pecans or almonds, to create your own unique bread recipe.
How to Determine When Your Walnut Bread is Done
Determining if your bread is done can sometimes be tricky. The easiest method is by using a thermometer – the bread should have an internal temperature of around 190-200°F (88-93°C) when it’s finished baking.
Another way to check if your walnut bread is done is by tapping the bottom of the loaf. If it sounds hollow, then it’s likely done. You can also check the color of the crust – it should be golden brown and have a slightly crispy texture. Lastly, you can insert a toothpick into the center of the bread. If it comes out clean, then your bread is ready to be taken out of the oven.
Storage Tips for Freshly Baked Walnut Bread
Once your bread is cooled and ready to store, keep it in an airtight container, or wrap it in foil to prevent it from drying out. You can store the bread at room temperature for a couple of days, but anything longer than that should go in the fridge or freezer to keep it fresher for longer.
Serving Suggestions for Delicious Walnut Bread
Walnut bread is incredibly versatile and goes with a plethora of food items. Perfect for toasting, try spreading some delicious butter or nut butter on top or dipping slices into a warming bowl of soup. You can also use it to make sandwiches, paninis, or toasties for a tasty lunchtime treat. Don’t forget to share it with friends and family.
Variations on the Classic Recipe: Experimenting with Different Flours and Spices
If you’re feeling adventurous, don’t be afraid to mix up the recipe. You can experiment with adding extra spices to give extra depth of flavour or try different flours. You could even consider substituting the flour with gluten-free flour if required.
Gluten-Free Alternatives and Modifications
If you’re gluten intolerant or following a gluten-free diet, you can make adjustments to the recipe to make it more suitable. Look for gluten-free flour instead and exercise caution when adding ingredients such as yeast or baking powder to ensure they are also gluten-free.
Now you know everything you need to make delicious walnut bread in the comfort of your own home. Try this delicious recipe out, and enjoy the benefits of both the flavoursome bread and the benefits of the walnuts themselves. Happy baking!