If you’ve ever tried phyllo dough in a savory or sweet dish, you know how delicate and crispy it can be. But did you know that making your own phyllo dough from scratch is entirely possible? Not only is it possible, but it’s also an excellent way to elevate your dishes and add a personal touch to your cooking. In this article, we’ll take you through all the steps of making phyllo dough from scratch, from gathering the ingredients to troubleshooting any problems that may arise.
Why making phyllo dough from scratch is worth it
While it may be tempting to buy pre-made phyllo dough from the grocery store, making your own has several advantages. For one, you have complete control over the ingredients you use, which allows you to make healthier or more specialized versions of the dough. Additionally, making phyllo dough from scratch is a satisfying and rewarding experience that can help you develop your skills in the kitchen. Finally, homemade phyllo dough has a unique taste and texture that is simply not present in store-bought options.
Another advantage of making phyllo dough from scratch is that it can be more cost-effective in the long run. While the initial investment in ingredients and equipment may seem daunting, once you have the necessary tools and knowledge, you can make multiple batches of phyllo dough for a fraction of the cost of buying pre-made options. This can be especially beneficial if you frequently use phyllo dough in your cooking or baking.
Ingredients needed for making phyllo dough
The ingredients list for phyllo dough is surprisingly short and sweet. You’ll need 2 cups of all-purpose flour, 1/2 teaspoon of salt, 3/4 cup of lukewarm water, and 1 tablespoon of olive oil. That’s it! Once you have these items on hand, it’s time to get started.
Phyllo dough is a staple in Mediterranean and Middle Eastern cuisine, and is used to make a variety of dishes such as baklava, spanakopita, and borek. The dough is made by rolling out thin layers of pastry, which are then stacked on top of each other to create a flaky, crispy texture. While it may seem daunting to make your own phyllo dough from scratch, the process is actually quite simple and can be done with just a few basic ingredients.
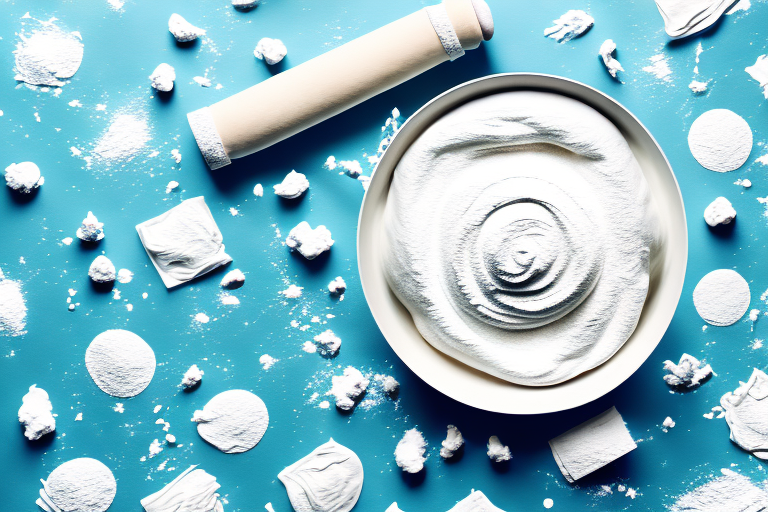
Step-by-step instructions for making phyllo dough
Making phyllo dough may seem daunting, but it’s actually a relatively straightforward process. Here are the steps you’ll need to follow:
- In a large mixing bowl, combine the flour and salt.
- Add the water and olive oil to the dry ingredients, and stir until a shaggy dough forms.
- Transfer the dough to a floured surface and knead for 10 minutes, until it becomes smooth and elastic.
- Cover the dough with a damp cloth and let it rest for 1 hour.
- After the dough has rested, divide it into 16 equal pieces.
- Using a rolling pin, roll out each piece of dough as thinly as possible.
- Brush each sheet of dough with olive oil and layer them on top of each other, until you have a stack of 16 sheets.
- Roll out the stack of dough one final time, until it is paper-thin.
Once you have your phyllo dough, there are many delicious dishes you can make with it. One popular option is spanakopita, a Greek spinach and feta pie. To make spanakopita, simply layer the phyllo dough with a mixture of spinach, feta cheese, and herbs, and bake until golden brown.
Another great use for phyllo dough is baklava, a sweet pastry made with layers of phyllo dough, honey, and nuts. To make baklava, layer the phyllo dough with a mixture of chopped nuts and honey, and bake until golden brown. Once it’s finished baking, drizzle with additional honey and let it cool before serving.
Tips for rolling out phyllo dough
Rolling out phyllo dough can be a challenging task, but with a few helpful tips, you can master the technique in no time. Firstly, make sure that your work surface is well-floured, as this will help prevent the dough from sticking. Next, use a good-quality rolling pin, and apply even pressure as you roll out the dough. It can also be helpful to rotate the dough periodically, to ensure that it is rolled out evenly. Finally, be patient! It may take a few tries to get the hang of rolling out phyllo dough, but with practice, you’ll soon be a pro.
Another important tip for rolling out phyllo dough is to keep it covered with a damp cloth or plastic wrap when you’re not working with it. This will prevent it from drying out and becoming brittle, which can make it difficult to work with. Additionally, if you’re making a large batch of phyllo dough, it can be helpful to divide the dough into smaller portions and work with one portion at a time. This will make it easier to handle and roll out, and will also help prevent the dough from drying out.
Finally, when you’re ready to use the rolled-out phyllo dough, be sure to handle it gently. It can be quite delicate, and can tear or break easily if handled roughly. If you do end up with a tear or hole in the dough, don’t worry – you can simply patch it up with a small piece of dough and continue rolling. With these tips in mind, you’ll be able to roll out phyllo dough like a pro in no time!
How to store and thaw homemade phyllo dough
Once you’ve made your phyllo dough, you’ll need to store it properly to ensure that it stays fresh and usable. The best way to store phyllo dough is to wrap it tightly in plastic wrap and then place it in a resealable plastic bag. This will prevent it from drying out and developing cracks. You can then freeze the dough for up to 3 months. When you’re ready to use it, simply thaw it overnight in the refrigerator, or at room temperature for a few hours.
It’s important to note that once you’ve thawed your phyllo dough, you should use it within a few days. This is because the dough can quickly dry out and become brittle if left exposed to air for too long. To prevent this, you can cover the dough with a damp cloth while you’re working with it, or brush it with a little bit of melted butter or oil to keep it moist.
If you find that your phyllo dough has become too dry or brittle, don’t worry – there are ways to salvage it. One trick is to lightly mist the dough with water using a spray bottle, or to brush it with a mixture of water and lemon juice. This will help to rehydrate the dough and make it more pliable. You can also try rolling the dough out a little bit thinner than usual, as this can help to hide any cracks or imperfections.
Delicious recipes using homemade phyllo dough
The possibilities for using homemade phyllo dough are endless. You can use it to make savory dishes like spanakopita or tiropita, or sweet treats like baklava or bougatsa. Here are a few recipes to get you started:
- Spinach and feta triangles: These savory little appetizers are a breeze to make and always impress guests.
- Baklava: A classic Greek dessert that’s made with layers of phyllo dough, honey, and nuts.
- Turkish borek: This dish is similar to spanakopita, but is made with ground meat instead of spinach.
- Cinnamon sugar chips: These sweet treats make a great snack or dessert and are perfect for dipping in chocolate or fruit sauce.
If you’re feeling adventurous, try making your own phyllo dough from scratch. It may seem daunting, but the results are worth it. Homemade phyllo dough has a flakier texture and a richer flavor than store-bought versions.
Another great way to use phyllo dough is to make a savory pie. Layer the dough with your favorite vegetables, meats, and cheeses, and bake until golden brown. It’s a great way to use up leftovers and create a delicious meal at the same time.
Common mistakes to avoid when making phyllo dough from scratch
Making phyllo dough from scratch can be a delicate process, and there are a few common mistakes to watch out for. Firstly, be sure to knead the dough thoroughly, as this is what will give it the necessary elasticity. Additionally, take care not to overwork the dough, as this can cause it to become tough and difficult to roll out. Finally, be mindful of the temperature of the dough, as it can become too warm and difficult to handle if left out for too long.
Another common mistake to avoid when making phyllo dough from scratch is not using enough flour when rolling it out. This can cause the dough to stick to the surface and tear, ruining the delicate layers. It’s important to use a generous amount of flour and to roll the dough out slowly and gently.
It’s also important to use the right type of flour when making phyllo dough. All-purpose flour can be used, but for a more authentic and traditional taste, many bakers prefer to use a combination of all-purpose and pastry flour. This combination creates a lighter and flakier dough that is perfect for making delicate pastries and desserts.
Troubleshooting tips for phyllo dough that doesn’t turn out right
If your phyllo dough doesn’t turn out right the first time, don’t worry! There are a few common issues that can occur and some easy fixes to try. If your dough is cracking or tearing, it may be too dry, and you can add a bit more water to the recipe to help it come together. If the dough is too soft and difficult to roll out, it may be too warm, so try refrigerating it for a bit before trying again. Finally, if the dough just isn’t cooperating, don’t be afraid to start over! Practice makes perfect, and you’ll soon be making perfect phyllo dough each time.
Another common issue that can occur with phyllo dough is that it becomes too sticky and difficult to handle. This can happen if the dough has too much moisture or if it has been overworked. To fix this, try dusting the dough with a bit of flour or cornstarch before rolling it out. You can also try letting the dough rest for a few minutes before continuing to work with it.
It’s also important to note that the type of flour you use can affect the texture and consistency of your phyllo dough. Traditional phyllo dough is made with a high-protein flour, such as bread flour or durum wheat flour. If you’re having trouble with your dough, try experimenting with different types of flour to see what works best for you.
Comparing homemade phyllo dough to store-bought options
When it comes to phyllo dough, there is a significant difference between homemade and store-bought options. Homemade phyllo dough has a unique taste and texture that cannot be replicated by store-bought varieties. Additionally, making your own dough allows you to control the ingredients and make healthier, more specialized versions. While store-bought options may be more convenient, making your own phyllo dough from scratch is a fun and rewarding experience that is well worth the effort.
One of the main advantages of making your own phyllo dough is that you can customize it to your liking. For example, you can add herbs or spices to the dough to give it a unique flavor. You can also adjust the thickness of the dough to suit your needs. This level of control is not possible with store-bought options.
Another benefit of making your own phyllo dough is that it can be a fun activity to do with friends or family. It can be a great way to bond over a shared love of cooking and trying new things. Plus, the satisfaction of creating something from scratch is hard to beat.